5 Tricks for Inflatable Obstacle Course Repair
5 tricks for Inflatable Obstacle Course Repair
Mastering Inflatable Obstacle Course Repair avoids the nightmare scenario every rental owner dreads.
It’s Saturday morning. The truck is loaded. You’re ready to roll. Then you see it—a massive tear in your star attraction. Every hour that unit sits dead in the warehouse is cash flushing down the drain.
In this business, downtime is the enemy.
Whether it’s grown adults racing like kids or the brutal combo of water and baking sun, your gear takes a beating. Duct tape won't save you here. To keep your reputation clean and your ROI high, knowing how to handle Inflatable Obstacle Course Repair is strictly required.
At CH Inflatable, we’ve spent 17 years building these beasts with 0.55mm 1300D PVC to meet CE EN14960 standards. We know how they’re built, so we know exactly how to fix them.
I’m going to walk you through the real techniques—from PVC vinyl patch kit applications to internal surgery on blown baffles.
1. Identification: Inspecting high-traffic wear zones
Before you even think about unscrewing the glue cap, you need a solid diagnosis.
I always tell guys in the shop: successful Inflatable Obstacle Course Repair starts with being a detective. Don't just scan for the obvious holes.
The soap test
Inflate that unit fully. Grab a spray bottle, mix some dish soap and water, and mist down the suspected areas. If it bubbles, you’ve found your leaker.
You need to scrutinize high-traffic wear zones. In my experience, 90% of the carnage happens in three spots:
- Entrance ramps (shoe scuffs are brutal here).
- Climbing wall grips (heavy pulling tears the vinyl).
- The bottom of the slide (friction burns).
Dealing with heavy modular units
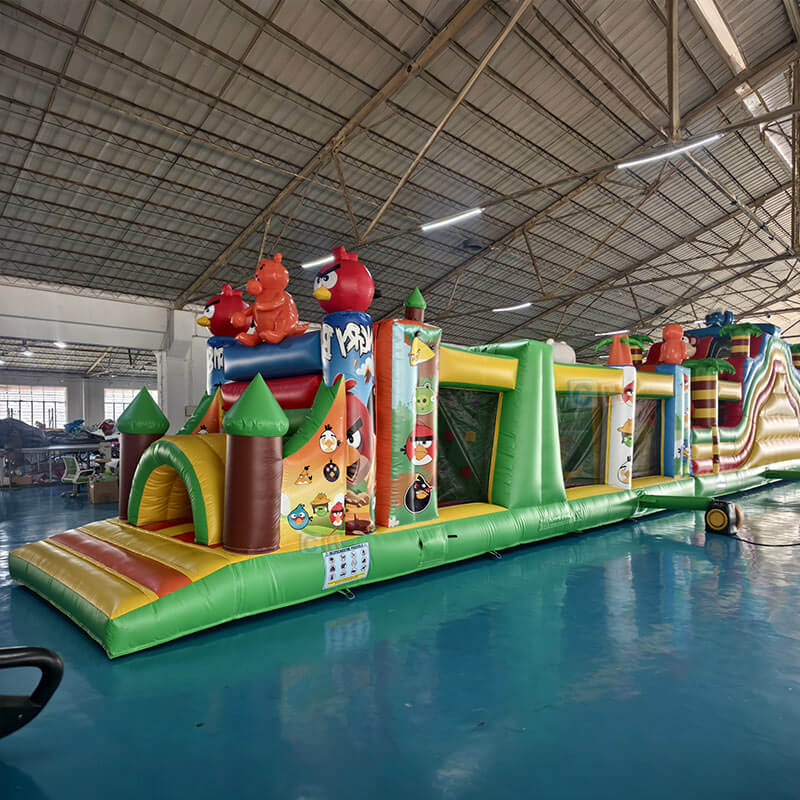
Bigger units hide their secrets well. If you are inspecting something massive, like the modular setups seen in the Inflatable Mega Obstacle Course Challenge Sections 1, 2, & 3 eInflatables, check the connections. The Velcro and zipper points between sections often fail first.
Ask yourself: is this just a surface scratch, or is it a structural tear through the mesh? A scratch is fine. A tear needs immediate Inflatable Obstacle Course Repair.
2. The art of the PVC vinyl patch kit
If I had a nickel for every time I saw someone use Super Glue on a bounce house, I’d be retired on a beach somewhere.
Household glues get brittle. When the inflatable flexes, that glue cracks. It’s useless. For a fix that lasts, you need to respect the material science. We use commercial-grade 0.55mm PVC.
To fix that, you need a PVC vinyl patch kit with solvent-based cement (like HH-66). This isn't just sticking things together; it creates a "Cold Weld," chemically melting the two pieces into one.
The process
- Clean: Scrub the area with MEK or acetone. Grease kills adhesion.
- Cut: Cut your patch. Always round the corners. Sharp corners snag and peel.
- Glue: Apply adhesive to both the patch and the unit.
- Wait: Let it get tacky (1-3 minutes) before pressing.
This is the same durability standard we use in our Jumping Castle. We provide repair kits with every unit that match this exact spec because we know quality matters.
3. Reinforcing seams and baffles
Sometimes the unit isn't leaking air out; it’s losing its shape. It looks pregnant. That is a blown baffle.
Baffles are the internal walls giving the course its structure. When one pops, Inflatable Obstacle Course Repair turns surgical. You are now dealing with heavy-duty baffle replacement.
Stitching vs. Gluing
Glue seals air. Stitching holds weight. For internal stress points, you need commercial stitching reinforcement. Don't glue a climbing anchor and expect it to hold a 200lb man.
Field repair basics
If you have to do this on-site:
- Open the zipper to crawl inside (turn the blower off first, obviously).
- Find the torn baffle.
- Use a sewing awl to restitch it to the wall.
Check out the internal layout of a standard 50 Obstacle Course | Magic Jump, Inc. to understand how many hidden stress points exist near pillars. If the mesh is shredded, you'll need to sew in a new strip effectively doing a heavy-duty baffle replacement.
4. Blower troubleshooting and airflow management
I’ve taken panicked calls about a unit "leaking everywhere," only to drive out there and find a perfectly good inflatable attached to a dying blower.
Before you slice into the vinyl for Inflatable Obstacle Course Repair, check your power. You need to master blower troubleshooting.
The "Soft Bounce"
We call it "Soft Bounce." The unit feels squishy. It’s dangerous for ankles and bad for business. Here is a quick reference table to diagnose the issue before you start cutting:
| Symptom | Likely Culprit | The Fix |
|---|---|---|
| Unit feels squishy | Blocked Intake | Remove plastic bags/leaves from blower fan. |
| Motor hums, low air | Voltage Drop | Ditch the thin orange cord. Use heavy 12-gauge extension cords. |
| Slow inflation | Wrong HP Rating | Ensure you aren't using a 1.0HP blower on a 2.0HP unit. |
| Sudden deflation | Zipper Failure | Check deflation zippers; re-lubricate and seal velcro. |
Visualizing the setup
To better understand Inflatable Obstacle Course Repair and pressure management, this video tutorial is highly recommended:
At CH Inflatable, we pair our units with CE-certified HW Blowers matched perfectly to the internal volume. It prevents that soft, sinking feeling.
5. Upgrading hardware and preventative care
The best Inflatable Obstacle Course Repair is the one you never have to make.
Preventative maintenance adds years to your revenue stream. Don't wait for things to snap.
Hardware focus
Look at your anchor points. Rusted D-rings snap under load. We upgraded our manufacturing to use stainless steel D-buckles—rust-proof and tough as nails.
Webbing & zippers
Check those YKK zippers. If they jam, use zipper wax. Inspect the tether straps. We use seatbelt-grade webbing, but if you see frying, stitch on a reinforcement strap immediately.
The pre-emptive patch
See a slide cover getting thin? Don't wait for the hole. Glue a reinforcement patch over it now. It acts as a sacrificial layer.
To keep a massive unit like our Inflatable Obstacle Playground Park running for years, add extra vinyl layers to the entrance steps before they ever wear through.
Expert tip: Invest in preventative reinforcement patches on slide bottoms before a hole appears. It keeps resale value high and headaches low.
Frequently Asked Questions (FAQ)
How to patch a hole in a commercial obstacle course?
Clean the area with acetone to strip the oils. Apply a commercial vinyl cement (like HH-66) to both your patch and the unit. Let the glue get tacky, then press hard. Crucial tip: For a proper Inflatable Obstacle Course Repair, let it cure for 24 hours before inflating.
What glue is best for 0.55mm PVC repair?
You need a solvent-based vinyl cement made for 0.55mm 1300D PVC. HH-66 or SX-69 is the gold standard. Stay away from Super Glue or Gorilla Glue—they don't flex, and they leave a nasty residue that makes professional repair harder later.
How often should I inspect obstacle seams?
Inspect them at every "Strike" (takedown) and before every setup. Look closely at the stress points near climbing walls. Catching a loose seam early prevents a catastrophic blowout during a detailed Inflatable Obstacle Course Repair inspection.
Wrapping it up
Mastering Inflatable Obstacle Course Repair is a journey, but it’s the only way to run a profitable shop.
By following these 5 tricks—Inspection, Cold Welding, Baffle Stitching, Blower Checks, and Hardware Upgrades—you keep your inventory safe and your weekends profitable.
Don't let endless repairs eat your margin. Upgrade your fleet today with CH Inflatable's commercial-grade obstacle courses, built with double-stitching and premium 0.55mm 1300D PVC to minimize wear.
Contact us for a quote regarding your custom inflatable needs!
Figure 2: Inflatable Obstacle Course Repair - Featured Product Detail
Image by: Multitech Institute
https://www.pexels.com/@multitech-institute-2155033298